
Gaming evolves fast—and if you’re searching for the latest insights on console trends, multiplayer strategies, and stick-based controller mechanics, you’re in the right place. Whether you’re optimizing your setup for competitive play or just trying to get more out of your current hardware, staying informed is the difference between average performance and a truly immersive experience.
This article is built to match exactly what you’re looking for: clear, practical guidance on today’s hottest gaming topics, smarter controller techniques, and setup improvements that actually make a difference. From fine-tuning responsiveness to improving comfort and precision, we focus on strategies you can apply immediately.
Our insights are grounded in hands-on testing, trend monitoring across the gaming community, and continuous analysis of evolving console ecosystems. You’ll also find actionable tips on setup optimization—including cable management for gaming—to help you create a cleaner, more efficient, and performance-ready environment.
Let’s break down what matters most right now—and how you can use it to level up.
From Cable Chaos to Command Center
To optimize your gaming experience and maintain a tidy environment, implementing effective cable management tips can work wonders, especially when paired with the innovative enhancements discussed in our article on Upgrades Hssgamestick.
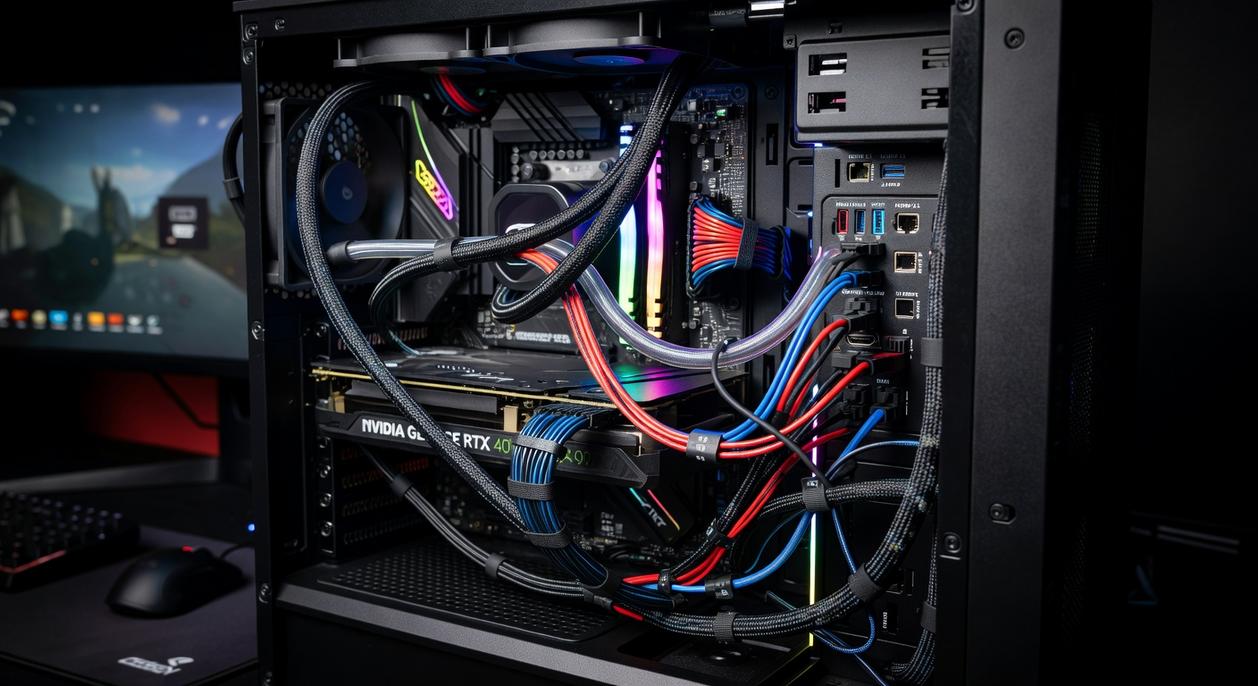
We’ve all seen it—the rat’s nest of wires lurking behind an otherwise epic gaming setup. However, messy cables aren’t just ugly; they block airflow, trap dust, and increase temperatures by up to 7°C, according to PC thermal testing reports. Consequently, overheating can shorten component lifespan.
In addition, tangled cords make swapping GPUs or consoles unnecessarily stressful. By applying practical cable management for gaming, you create airflow paths and easier maintenance. Case studies from custom PC builders show organized setups reduce cleaning time significantly.
Step by step, you’ll transform chaos into a streamlined battle station.
Your Cable Management Toolkit: Essential Gear for a Clean Setup
A clean desk doesn’t happen by accident. It happens when you pick the right tools—and more importantly, when you know why one option beats another.
Velcro Ties vs. Zip Ties
Velcro ties are adjustable, reusable fasteners that wrap around cables and secure with hook-and-loop fabric. Zip ties, by contrast, are single-use plastic fasteners that lock into place permanently. If you’re constantly upgrading gear (new headset, second monitor, surprise console addition), Velcro wins for flexibility. On the other hand, zip ties provide an ultra-tight, no-slip hold—ideal for long-term installs where nothing’s moving. Think temporary LAN setup vs. “this desk isn’t changing for years.” Pro tip: use Velcro near components and zip ties deeper along fixed runs.
Cable Sleeves & Raceways
Both bundle multiple cables into one path, but sleeves wrap cables into a flexible tube, while raceways are rigid channels mounted to walls or desks. Sleeves are perfect from PC to monitor; raceways shine when you want invisible lines along a wall.
Adhesive Cable Clips/Mounts
These small anchors guide cables discreetly under desks or behind monitors. They’re the unsung heroes of cable management for gaming.
The Right Power Strip
A mountable surge protector lifts bulky bricks off the floor—cleaner and safer (see CPSC surge guidance).
Optional but Recommended
A label maker prevents “mystery cord syndrome,” and double-sided tape secures lightweight hubs neatly in place.
The 5-Step Method to Perfect Cable Organization
A clean setup isn’t just about aesthetics—it improves airflow, simplifies troubleshooting, and makes upgrades painless. Here’s a practical, step-by-step method you can follow today.
Step 1: The Full Reset (Unplug Everything)
Start with a blank slate. Unplug every single cable—yes, all of them. This includes power cords, HDMI (High-Definition Multimedia Interface) cables, USB (Universal Serial Bus) connectors, and Ethernet lines.
Why so extreme? Because organizing around existing chaos just hides the problem (like shoving clutter into a drawer and calling it “minimalist”). A full reset lets you see exactly what you’re working with.
Pro tip: Snap a quick photo before unplugging so you remember where specialty cables go.
Step 2: Plan Your Pathways
Before reconnecting anything, position your console, PC, monitor, and speakers exactly where you want them.
Group cables by type:
- Power cables
- Display cables
- Peripheral cables (keyboard, mouse, controller, headset)
Visualize the shortest, cleanest path each group can take. Think of it like city planning—efficient roads prevent traffic jams.
Step 3: Mount Your Foundation (The Power Strip)
Secure your surge protector (a device that protects electronics from voltage spikes) underneath your desk using screws or heavy-duty adhesive strips. This becomes the anchor for your entire power setup.
When the strip is elevated, floor clutter disappears instantly—and vacuuming becomes less of a boss fight.
Step 4: Connect, Route, and Bundle
Plug devices back in, starting with bulky power adapters. Route cables along planned paths, bundling those moving in the same direction with Velcro ties or sleeves.
This is where cable management for gaming truly comes together—clean routing improves both performance access and visual clarity.
Step 5: Secure and Conceal
Use adhesive cable clips to fasten bundles along desk edges and legs. Sit in your chair and check sightlines—nothing should be visible.
For even better comfort while admiring your clean setup, consider choosing the right gaming chair for ergonomic support.
The result? A setup that looks intentional, performs better, and feels next-level organized.
Level Up: Advanced Tactics for a Pro-Level Look
I’ll start with a confession: the first time I “finished” my setup, it looked clean—until I stood up. From underneath, it was pure spaghetti. That’s when I realized cable management for gaming isn’t about what you see at eye level; it’s about controlling every angle.
First, use what your desk already gives you. Built-in grommets (those circular cutouts for routing cables) and cable trays are there for a reason. Feed monitor, keyboard, and charging lines straight through them. If your desk doesn’t have one, drilling a clean, measured hole with a grommet insert can create a custom pass-through (measure twice, drill once).
Next, controllers and peripherals. Stick-based controllers often need frequent charging, so magnetic USB cables are a lifesaver—they snap in place and reduce port wear. For wireless dongles, plug them into a small USB hub mounted under the desk. This shortens visible cable runs and keeps signals stable. Pro tip: label the hub ports underneath so you’re not guessing later.
For that floating monitor effect, route cables along the monitor arm using built-in clips or Velcro ties. Run them down the arm’s backside so, from the front, the screen appears magically suspended (very sci-fi command center).
Meanwhile, consoles bring unique chaos: bulky power bricks, HDMI, USB, Ethernet. Tuck power bricks into a ventilated basket mounted under the desk or behind a media unit. Then bundle HDMI and USB lines together with reusable ties for a single, clean path.
It takes effort—but the transformation is worth it.
Maintaining your clean setup isn’t just about aesthetics; it directly impacts performance. When cables are routed neatly, airflow improves, dust buildup slows, and your PC components stay cooler under pressure. That means fewer random shutdowns and smoother late-night sessions (because nothing kills momentum like a thermal warning). Just as important, troubleshooting becomes painless. Instead of untangling a dusty cable nest, you can swap a GPU or add storage in minutes.
Of course, some gamers argue that once it’s tidy, you can forget about it. But what’s next when you grab a new headset or controller? That’s where the One In, One Out Rule comes in. Immediately manage the cable of any new peripheral before you even power it on. Treat cable management for gaming as an ongoing habit, not a one-time fix.
Do that, and you’ll never face accidental unplugs or upgrade dread again. Your space simply works better daily.
Level Up Your Setup and Performance
You came here to figure out how to optimize your gaming setup, improve controller precision, and stay ahead of the latest console and multiplayer trends. Now you have a clear roadmap—from refining stick mechanics to upgrading your environment for smoother, more competitive play.
The truth is, inconsistent performance, messy setups, and overlooked technical tweaks can quietly hold you back. Even the best strategies fall apart when your space and gear aren’t fully optimized. Dialing in your sensitivity, mastering stick control, and improving cable management for gaming can dramatically boost comfort, reaction time, and focus.
Now it’s time to act. Audit your current setup today. Adjust your controller settings, streamline your desk space, and apply the optimization tips you’ve learned. Thousands of competitive players are already upgrading their performance with proven setup strategies—don’t let poor configuration be the reason you lose your next match.
Take control of your setup now and turn every session into your most competitive one yet.
 There is a specific skill involved in explaining something clearly — one that is completely separate from actually knowing the subject. Sylvara Ollvain has both. They has spent years working with stick-based game controller mechanics in a hands-on capacity, and an equal amount of time figuring out how to translate that experience into writing that people with different backgrounds can actually absorb and use.
Sylvara tends to approach complex subjects — Stick-Based Game Controller Mechanics, Pro Tips Collection, Console Gaming Trends and Insights being good examples — by starting with what the reader already knows, then building outward from there rather than dropping them in the deep end. It sounds like a small thing. In practice it makes a significant difference in whether someone finishes the article or abandons it halfway through. They is also good at knowing when to stop — a surprisingly underrated skill. Some writers bury useful information under so many caveats and qualifications that the point disappears. Sylvara knows where the point is and gets there without too many detours.
The practical effect of all this is that people who read Sylvara's work tend to come away actually capable of doing something with it. Not just vaguely informed — actually capable. For a writer working in stick-based game controller mechanics, that is probably the best possible outcome, and it's the standard Sylvara holds they's own work to.
There is a specific skill involved in explaining something clearly — one that is completely separate from actually knowing the subject. Sylvara Ollvain has both. They has spent years working with stick-based game controller mechanics in a hands-on capacity, and an equal amount of time figuring out how to translate that experience into writing that people with different backgrounds can actually absorb and use.
Sylvara tends to approach complex subjects — Stick-Based Game Controller Mechanics, Pro Tips Collection, Console Gaming Trends and Insights being good examples — by starting with what the reader already knows, then building outward from there rather than dropping them in the deep end. It sounds like a small thing. In practice it makes a significant difference in whether someone finishes the article or abandons it halfway through. They is also good at knowing when to stop — a surprisingly underrated skill. Some writers bury useful information under so many caveats and qualifications that the point disappears. Sylvara knows where the point is and gets there without too many detours.
The practical effect of all this is that people who read Sylvara's work tend to come away actually capable of doing something with it. Not just vaguely informed — actually capable. For a writer working in stick-based game controller mechanics, that is probably the best possible outcome, and it's the standard Sylvara holds they's own work to.